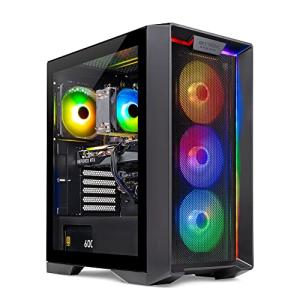
Video RAM (VRAM) is essential for handling high‑resolution textures and complex graphics computations. Upgrading VRAM can dramatically improve rendering speed and visual fidelity in gaming and creative applications.
Evaluate your current VRAM usage through benchmarking tools to determine if your workloads benefit from additional memory. Select GPUs with higher VRAM capacities that align with your graphic demands. Adjust in‑game settings and creative software parameters to balance VRAM usage and optimize performance. Regular firmware updates ensure that your GPU remains efficient.
Upgrading VRAM is a targeted method to boost graphics performance in demanding applications. By selecting the appropriate GPU and optimizing workload settings, you can achieve higher resolution visuals and smoother frame rates in everyday tasks.
Complete VRAM Upgrade Guide: Boost Graphics Performance & Visual Fidelity
Video RAM (VRAM) is the dedicated memory on your graphics card that holds textures, frame buffers, shaders, and compute data. In graphically intensive tasks—such as 4K gaming, 3D rendering, and video editing—insufficient VRAM can throttle your system, causing stutters, texture pop-ins, and low frame rates. This guide explores comprehensive strategies for a successful VRAM upgrade, from benchmarking and GPU selection to software tuning and firmware maintenance.
1. Understanding VRAM and Its Role
VRAM differs from system RAM by offering higher bandwidth and lower latency specifically for graphics operations. It stores:
- High-resolution textures: Detailed images mapped onto 3D models.
- Frame buffers: Completed image frames before display output.
- Shader programs and constants: Data used by GPU cores to execute lighting, effects, and compute tasks.
- G-Buffer and geometry buffers: Intermediate rendering passes in applications like real-time ray tracing.
When VRAM is exhausted, the GPU spills data into slower system memory, leading to performance drops. Upgrading VRAM capacity ensures native high-speed access to all necessary assets, delivering smoother visuals and faster render times.
2. Assessing VRAM Needs Through Benchmarking
Before purchasing a new GPU, quantify your current VRAM usage and performance bottlenecks:
- Built-in monitoring tools: Use MSI Afterburner, GPU-Z, or NVIDIA’s Frameview to track VRAM consumption and frame times in real time.
- Integrated game benchmarks: Run “Ultra” or “4K” presets in titles like Cyberpunk 2077, Red Dead Redemption 2, or Flight Simulator 2020 to see peak VRAM demand.
- Creative workload tests: In Adobe Premiere Pro and DaVinci Resolve, inspect timeline memory usage during color grading and GPU-accelerated effects.
- Synthetic stress tests: Employ 3DMark, Unigine Superposition, or SPECviewperf to simulate extreme VRAM loads under controlled conditions.
Document average and peak VRAM usage. For stable performance, target a GPU with at least 20–30% more VRAM than your highest measured usage.
3. Choosing the Right GPU for Your VRAM Upgrade
Selecting a GPU involves balancing VRAM capacity, memory bus width, and budget. Below is a comparison of popular graphics cards:
| GPU Model | VRAM | Memory Bus | Bandwidth | Ideal Use Case |
|---|---|---|---|---|
| NVIDIA GeForce RTX 4060 Ti | 8 GB GDDR6 | 128-bit | 448 GB/s | 1080p/1440p gaming |
| NVIDIA GeForce RTX 4070 | 12 GB GDDR6X | 192-bit | 504 GB/s | 1440p high-fps gaming |
| NVIDIA GeForce RTX 4080 | 16 GB GDDR6X | 256-bit | 716.8 GB/s | 4K gaming & real-time ray tracing |
| AMD Radeon RX 7900 XT | 20 GB GDDR6 | 320-bit | 800 GB/s | 4K gaming & creative workflows |
| AMD Radeon RX 7900 XTX | 24 GB GDDR6 | 384-bit | 960 GB/s | 4K/8K high-end rendering |
For gamers targeting 1440p or 4K resolutions, 12 GB+ of VRAM ensures headroom for future titles. Creative professionals working with multi-layer timelines or 3D simulations should consider 16 GB to 24 GB models to avoid swapping to system RAM.
4. Optimizing Software Settings for VRAM Efficiency
Even with ample VRAM, suboptimal settings can waste memory. Tailor application parameters to balance high performance dual boot or single-OS scenarios:
- In-Game Texture Quality: Scale down ultra-high textures in AAA titles if VRAM usage exceeds 90% during benchmarks.
- Render Resolution and Anti-Aliasing: Use DLSS or FSR upscaling to reduce native frame buffer size while maintaining visual clarity.
- Buffer and Cache Limits: In creative software (Blender, Substance Painter), cap texture cache to available VRAM minus 1 GB to preserve headroom.
- Concurrent Application Usage: Close background GPU-accelerated apps (e.g., Chrome with WebGL tabs) to free VRAM for primary tasks.
- Virtual Texturing: Enable virtual texturing or “mega-texture” modes only when necessary for open-world scenes.
5. Advanced VRAM Management Techniques
For power users, advanced tweaks can eke out extra performance:
- Manual Page File Allocation: On Windows, place pagefile.sys on a separate SSD to reduce interference with VRAM overflow.
- Linux UMA (Unified Memory Architecture): For integrated GPUs, adjust
i915oramdgpudriver parameters to allocate more VRAM at boot. - Custom Overclocking Profiles: Use MSI Afterburner or AMD Radeon Software to increase VRAM clock rates for bandwidth gains—monitor stability closely.
- Shader Pre-Compilation and Caching: Pre-cache frequently used shaders in Unreal Engine or Unity to reduce runtime VRAM load spikes.
- Multi-GPU Scaling: In professional renderers (Octane, Redshift), distribute textures across multiple GPUs’ VRAM to handle massive datasets.
6. Firmware, Driver Updates & Maintenance
Maintaining up-to-date firmware and drivers is critical for GPU VRAM optimization:
- BIOS/UEFI Updates: Ensure your motherboard firmware supports the latest PCIe standards (3.0/4.0/5.0) for maximum GPU bandwidth.
- GPU Driver Upgrades: Use NVIDIA GeForce Experience or AMD Radeon Software to install WHQL-certified drivers with VRAM performance tweaks and bug fixes.
- Firmware Patches: Some GPU manufacturers release firmware that optimizes memory timings and power delivery—apply these via vendor tools.
- Periodic Clean-Installs: Use DDU (Display Driver Uninstaller) to remove old driver remnants before installing major new versions.
7. Balancing VRAM and Overall System Performance
A holistic approach ensures your high performance dual boot or single-OS PC remains balanced:
- System Memory (RAM): Pair 32 GB or more of system RAM with 16 GB+ of VRAM for video editing and 3D design.
- Storage Speed: NVMe SSDs accelerate texture loading when VRAM is exceeded.
- CPU–GPU Coordination: Avoid CPU bottlenecks by matching GPU VRAM upgrades with multi-core processors (6+ cores for gaming, 12+ for rendering).
- Power Delivery: Use a high-quality PSU with sufficient wattage and stable 12 V rails to support VRAM overclocks and heavy loads.
8. Conclusion
Upgrading VRAM is one of the most effective ways to enhance graphics performance and visual fidelity in gaming and creative workloads. By benchmarking current VRAM usage, selecting the right GPU, tuning software settings, and maintaining drivers and firmware, you ensure that your system handles high-resolution textures and complex shaders without compromise. Pair these optimizations with balanced system RAM, fast storage, and robust power delivery to unlock the full potential of your high-performance PC.
Ready to boost your VRAM capacity? Explore our online store’s curated selection of GPUs, cooling solutions, and power supplies—everything you need for a seamless VRAM upgrade and superior graphics performance.