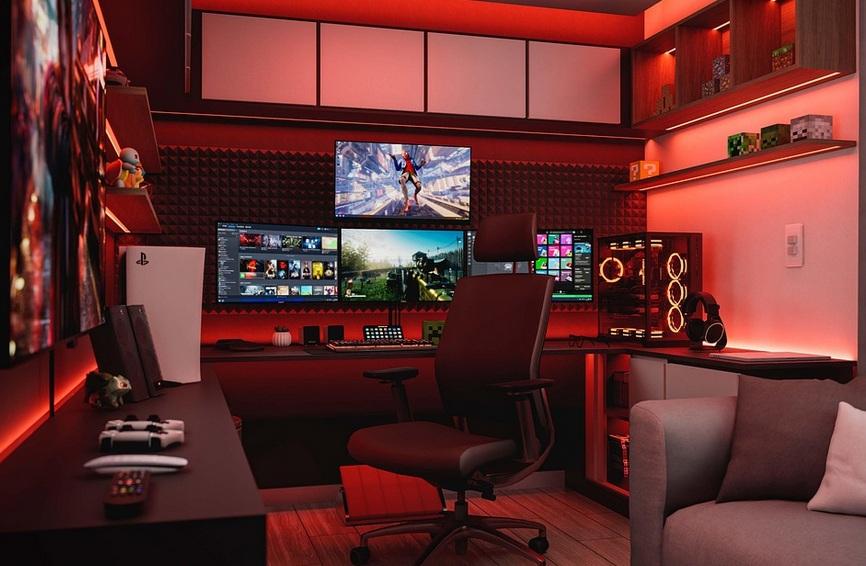
Home virtualization servers allow users to run multiple operating systems for development, testing, or enterprise simulations on a single high‑performance PC. This article outlines strategies for building a robust virtualization server that maximizes computing resources while maintaining reliability.
Select a multi‑core processor with ample threads and pair it with high‑capacity, fast DDR memory to distribute workloads efficiently. Use a motherboard with extensive PCIe slots and robust networking options for multiple virtual machines (VMs). Install a type‑1 or type‑2 hypervisor, and configure resource allocation parameters to ensure each VM receives sufficient CPU, memory, and storage. Incorporate SSDs or NVMe drives to reduce boot times and facilitate rapid data transfers between VMs.
By carefully selecting high‑performance components and configuring dedicated virtualization settings, you can build a home virtualization server that meets the demands of development and testing environments while maintaining system stability and responsiveness.
Comprehensive Guide to Building a High-Performance Home Virtualization Server
Unlock the full potential of your development, testing, or lab environment by leveraging a home virtualization server. Consolidate multiple virtual desktops and operating systems on a single, powerful PC. This guide walks you through every step—from hardware selection to hypervisor setup—to achieve high performance virtualization, rock-solid stability, and seamless multi-VM configuration.
1. Introduction
Running a fleet of virtual machines in a home lab offers immense flexibility for:
- Software development and continuous integration
- Operating system testing and sandboxing
- Enterprise simulation and network emulation
To deliver top-tier performance, you need the right mix of virtualization hardware, precise VM resource allocation, and reliable storage such as NVMe and SSD drives. Let’s dive into the key strategies.
2. Benefits of a Home Virtualization Server
- Cost Efficiency
- Replace multiple physical PCs with one consolidated server.
- Lower power consumption and noise.
- Scalability
- Add CPU, memory, or storage on demand for new VMs.
- Support dozens of virtual desktops without hardware sprawl.
- Isolation & Security
- Run untrusted code in isolated VMs.
- Snapshot or revert environments instantly.
- Centralized Management
- Manage, backup, and monitor all VMs from a single console.
- Streamline updates and patches.
3. Planning Your Virtualization Server
Before purchasing, map out your intended workloads:
- Number of VMs: Web servers, database servers, development boxes, etc.
- Performance Profile: CPU-bound builds, memory-intensive applications, or I/O-heavy databases.
- Availability Needs: 24/7 uptime, backup strategy, UPS requirements.
Use this plan to right-size CPU cores, RAM capacity, and storage bandwidth.
4. CPU & Memory: The Foundation of High Performance Virtualization
4.1 Multi-Core CPU Selection
- Core Count: Aim for 8–16 cores (e.g., AMD Ryzen 9, Intel Xeon) for heavy multi-VM configuration.
- Threading: Hyper-threading or SMT doubles logical threads for parallel VM workloads.
- Virtualization Extensions: Intel VT-x or AMD-V ensure compatibility with Type-1 hypervisors.
4.2 Memory Capacity & Speed
- Baseline: 32 GB DDR4/DDR5 for light labs; upgrade to 64–128 GB for larger pools.
- Frequency & Latency: Faster memory (≥ 3200 MHz) reduces contention under load.
- ECC vs. Non-ECC: ECC memory offers error correction—ideal for mission-critical virtual environments.
5. Storage: SSD Virtualization & NVMe Excellence
| Storage Type | Pros | Cons |
|---|---|---|
| SATA SSD | Affordable, reliable | ~ 550 MB/s throughput |
| NVMe SSD | 2,000–7,000 MB/s, low latency | Higher cost per GB |
| RAID Array | Redundancy + performance (RAID 10) | Requires multiple drives & controller |
Best Practices
- Install your hypervisor and critical VMs on NVMe storage for minimal boot and I/O latency.
- Use separate SSD volumes for each VM or group by workload type.
- Consider hardware RAID or software RAID 10 for redundancy and speed in database VMs.
6. Motherboard & Networking Essentials
- PCIe Expansion: Multiple x16 slots for GPU passthrough or NVMe add-in cards; x4/x8 slots for dedicated network or RAID controllers.
- Networking: Onboard 2.5 GbE or 10 GbE ports for VM interconnect and storage network; support for VLAN tagging and virtual switches.
- BIOS/UEFI Features: Enable IOMMU/VT-d for PCI passthrough; customize boot order and power-on settings for automatic recovery.
7. Hypervisor Setup & Configuration
7.1 Type-1 vs. Type-2 Hypervisors
- Type-1 (Bare Metal): VMware ESXi, Proxmox VE, Microsoft Hyper-V Server – superior performance and isolation.
- Type-2 (Hosted): VirtualBox, VMware Workstation – easier install on an existing OS, but slightly higher overhead.
7.2 Resource Allocation
- CPU Shares & Limits: Allocate cores or share units per VM.
- RAM Reservations: Guarantee minimum memory for critical services.
- Storage IOPS Limits: Prevent noisy neighbors from saturating disks.
8. VM Resource Allocation Best Practices
| VM Role | CPU Cores | RAM | Storage | Network |
|---|---|---|---|---|
| Web Server | 2 | 4 GB | SATA SSD | 1 GbE |
| Dev/Test Machine | 4 | 8 GB | NVMe SSD | 2.5 GbE |
| Database Server | 6–8 | 16–32 GB | RAID 10 NVMe | 10 GbE |
| Virtual Desktop | 2–4 | 4–8 GB | SATA SSD | 1 GbE |
| Sandbox VM | 1–2 | 2–4 GB | HDD or SSD | 1 GbE |
Monitor and adjust allocations based on actual usage via your hypervisor’s management console.
9. Virtual Desktop Enhancements
- GPU Passthrough: Assign a dedicated graphics card to a VM for accelerated rendering.
- Snapshot & Cloning: Quickly replicate or restore environments with built-in hypervisor features.
- Guest Tools: Install VMware Tools or VirtualBox Guest Additions for optimized drivers and clipboard sharing.
10. Security & Backup Strategies
- Regular Snapshots: Capture VM state before major updates or code pushes.
- Offsite Backups: Export VM images to external storage or cloud to guard against hardware failure.
- Network Segmentation: Use virtual LANs to isolate sensitive VMs.
- Firewall & Antivirus: Deploy at the hypervisor and VM levels for layered defense.
11. Recommended Virtualization Hardware Bundles
Starter Bundle
- 8-Core Ryzen CPU
- 32 GB DDR4
- 500 GB NVMe SSD
- Micro-ATX motherboard
- 1 GbE
Professional Bundle
- 12-Core Intel Xeon
- 64 GB ECC DDR4
- 1 TB NVMe PCIe 4.0
- 10 GbE NIC
- Full-ATX chassis
Enterprise Lab Bundle
- Dual-CPU Xeon Scalable
- 128 GB ECC DDR4
- 4 × 1 TB NVMe RAID 10
- 10/25 GbE switch
12. Conclusion & Next Steps
Building a high performance virtualization server at home is within reach when you:
- Choose a multi-core CPU and fast DDR memory.
- Invest in NVMe storage or SSD virtualization volumes.
- Deploy a Type-1 hypervisor with careful VM resource allocation.
- Secure and back up your environment regularly.
Ready to assemble your dream virtualization lab? Browse our complete selection of virtualization hardware, NVMe drives, multi-core CPUs, and hypervisor software in our online store—and start running dozens of virtual desktops on a single, rock-solid platform today.