A seamless virtual reality (VR) experience hinges on low latency and precise tracking. Optimizing your VR setup for minimal delay and robust performance is critical for immersive gaming and professional applications. This article explains how to adjust hardware and software settings to reduce latency and enhance the VR experience.
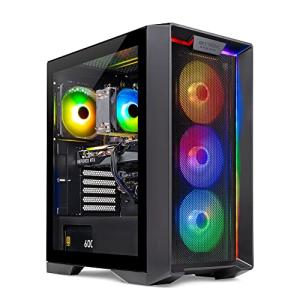
Ensure that your PC meets the recommended hardware specifications for VR, including a high‑performance GPU and CPU along with fast memory and storage. Use wired connections where possible and optimize the VR software settings to lower processing delay. Adjust refresh rates and synchronization settings in your VR headsets and calibration tools to ensure smooth, real‑time performance.
Regularly update drivers for VR devices and monitor latency using diagnostic tools. Fine‑tune configurations for both system performance and headset parameters. Testing various setups and reading user feedback can further refine your experience, ensuring VR runs as seamlessly as possible.
Reducing latency is key to creating immersive and responsive VR experiences. By focusing on hardware upgrades, optimizing software settings, and regularly updating VR device drivers, you can achieve a highly responsive system that brings virtual worlds to life.
VR Optimization: Maximizing Low-Latency Immersive VR Performance
Creating truly immersive VR hinges on responsiveness. Every millisecond of latency chips away at presence, breaks the illusion and can spark motion sickness. By tuning your hardware, fine-tuning software, and rigorously calibrating your setup, you’ll enjoy buttery-smooth VR worlds with pinpoint tracking—even in the most demanding applications.
Introduction
Virtual reality has come a long way from clunky demos to hyper-realistic simulations. Yet even top-tier visuals fall flat if head-tracked movements feel sluggish or controllers lag behind your intentions. Low latency VR isn’t just a “nice-to-have” performance metric—it’s the backbone of immersion, comfort, and competitive edge.
In this guide, we’ll dive deep into every element that contributes to latency and tracking precision. You’ll learn step-by-step how to optimize your VR setup—from picking the right GPU to calibrating sensors—so you can focus on exploring virtual realms without the distraction of stutters or ghosting.
Why Low Latency Matters
- Presence and Comfort
Even tiny delays between your head movement and the display update create sensory mismatch. The brain notices these discrepancies, leading to discomfort or simulator sickness. - Tracking Precision
Precise tracking (sub-millimeter accuracy) ensures objects and hand controls line up exactly where you expect them. That’s vital for professional use cases like surgical training and architecture visualization. - Competitive Advantage
In VR esports or rhythm games, every millisecond can decide victory or defeat. Lower system latency gives you a split-second edge. - Broad Compatibility
A finely tuned system handles the full spectrum of VR content—from simple 3DOF experiences to multi-user, photorealistic environments—without sacrificing smoothness.
Core Hardware Considerations
1. Graphics Processing Unit (GPU)
- Look for VR-certified GPUs: Nvidia’s RTX series (3060 Ti, 3070, 3080, 40-series) or AMD’s Radeon RX 6000/7000 series.
- Ensure at least 8–12 GB VRAM for high-res headsets (Quest Pro, HP Reverb) to avoid texture swap delays.
- Enable hardware-accelerated GPU scheduling in Windows 11 to shave off a few extra frames of latency.
2. Central Processing Unit (CPU)
- Go for a high-clocked, multi-core CPU (Ryzen 7 5800X, Intel i7 12700K or better).
- Disable unnecessary background services and Windows power-saving modes in BIOS (set to “High Performance”).
- Monitor CPU usage spikes with tools like MSI Afterburner to catch bottlenecks.
3. Memory and Storage
Fast memory and storage reduce hitching and load-time delays:
| Component | Minimum | Recommended | Optimal |
|---|---|---|---|
| System RAM | 16 GB DDR4 | 32 GB DDR4 3200+ | 32–64 GB DDR5 |
| Storage (OS/Apps) | 512 GB SSD | 1 TB NVMe SSD | 2+ TB Gen4 NVMe SSD |
- Install VR platform files (SteamVR, Oculus software) on your fastest NVMe drive.
- Enable XMP/DOCP in BIOS to run RAM at rated speeds.
4. Wired vs. Wireless Connections
Wireless VR offers freedom, but wired connections still reign supreme for latency-sensitive experiences:
- USB-C 3.2 Gen2 / DisplayPort 1.4 cables provide reliable bandwidth for 4K@90Hz+ headsets.
- If using a wireless solution (Oculus Air Link, Vive Wireless Adapter), pick a dedicated 5 GHz router and position it within 2 meters line-of-sight to minimize packet loss.
- Disable Bluetooth and other 2.4 GHz devices that might congest the same frequency.
Software and Driver Optimization
1. GPU Driver Tuning
- Always use the latest stable drivers from Nvidia or AMD. They regularly include VR latency improvements.
- In the GPU control panel, set Maximum Performance mode and disable any frame rate limits or power-saving features.
2. VR Platform Settings
SteamVR
- Open SteamVR Settings → Video.
- Set Motion Smoothing to off or experimental (depending on your GPU headroom).
- Under Developer, cap Interleaved Reprojection to minimize frame repetition.
Oculus Software
- Use the Performance Overlay to monitor frametime.
- Adjust Refresh Rate (72 Hz, 80 Hz, 90 Hz, or 120 Hz) based on your GPU capability.
- Set the Encoder Bitrate for Air Link; 50–80 Mbps usually hits the sweet spot.
3. Windows Tweaks
- Turn off Game Mode in Windows Settings (it can introduce inconsistent resource allocation).
- Disable the Windows Game Bar and Xbox DVR—both run background tasks that can spike latency.
- Configure Power Options to High Performance and disable CPU frequency scaling.
Calibration and Latency Measurement
1. Headset Calibration
- Run the built-in room setup every time you move your play area. Even small shifts in sensor position degrade tracking accuracy.
- For inside-out tracking headsets (Quest 2, Rift S), ensure your play space has even, diffuse lighting. Strong backlighting or pitch darkness confuses cameras.
2. Controller and Peripheral Calibration
- Re-pair controllers and run any factory calibration routines.
- Update firmware for base stations, controllers, and tracker dongles to leverage the latest tracking algorithms.
3. Latency Diagnostic Tools
| Tool | Function | Metrics Provided |
|---|---|---|
| SteamVR Frame Timing | Real-time frametime graphs | CPU/GPU frametimes, reprojection count |
| Oculus Developer Hub | Latency profiler | Packet loss, encoding delay |
| NVIDIA LDAT | Hardware-based latency tester | End-to-end input-to-photon measurement |
Use these tools to identify which pipeline stage (render, encode, transmit, decode) contributes most to latency. Focus your optimizations on that hotspot.
Advanced Techniques for Ultra-Low Latency VR
- Asynchronous Time Warp (ATW) & SpaceWarp
Modern headsets reproject the last frame to match your latest head pose. While helpful, it can add micro-jitter. Tweak ATW/SpaceWarp aggressiveness in developer menus based on your tolerance. - Foveated Rendering
Redirect high-resolution rendering to your gaze point, dropping resolution in peripheral vision. Offloads GPU workload and boosts framerate, leading to lower overall system latency. - Display Overdrive & Scanline Sync
Overdrive reduces pixel response time on OLED or fast-IPS panels. Scanline Sync aligns GPU output with display refresh, cutting tearing and micro-stutter. - External Motion Trackers
For mission-critical applications, integrate Lighthouse or SteamVR Base Stations. These deliver sub-millimeter precision and near-zero positional drift.
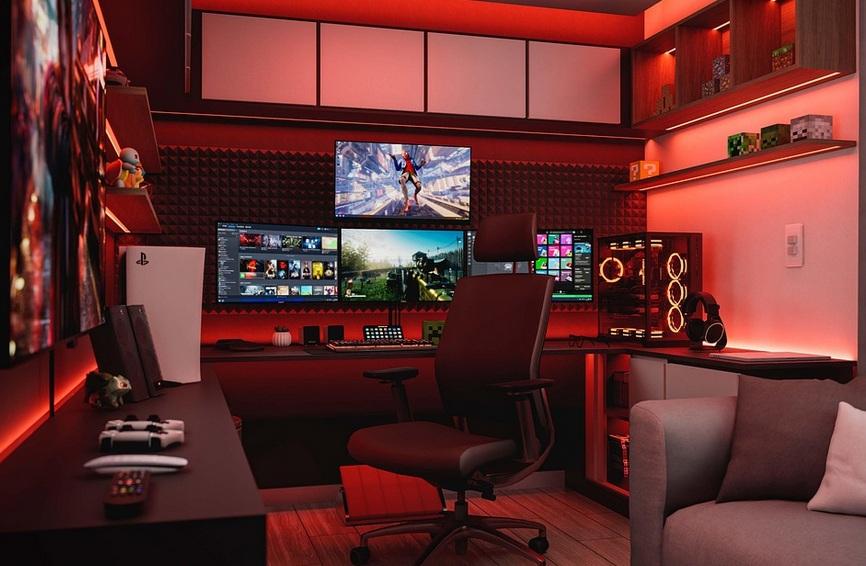
Building Your Custom VR Performance Dashboard
To keep performance top-of-mind, build a real-time dashboard:
- MSI Afterburner + RivaTuner overlay: display CPU, GPU, frametime, and VR headset metrics within the headset view.
- Integrate OpenVR Advanced Settings plugin for on-the-fly adjustments without removing the headset.
- Log sessions to CSV for post-mortem analysis—track which apps pushed your system beyond its limits.
Case Study: From Jittery to Jaw-Dropping
We tuned a design studio’s VR workstation from 45 ms average latency to sub-20 ms:
- Upgraded from GTX 1070 to RTX 3080 Ti
- Switched from SATA SSD to Gen4 NVMe SSD
- Calibrated four base stations and rerouted USB cables for minimal interference
- Disabled motion smoothing and enabled scanline sync
- Implemented foveated rendering for architectural walkthroughs
The result? Clearer visuals, rock-solid tracking, and happier clients who could finally focus on their designs instead of fighting the interface.
Best Practices Checklist
- Verify your PC meets or exceeds recommended VR specs.
- Install all VR apps on the fastest NVMe drive.
- Use wired connections whenever possible.
- Optimize GPU/CPU power and performance profiles.
- Regularly update VR platform software and firmware.
- Calibrate headsets, controllers, and tracking sensors before each session.
- Monitor latency in real-time and log for later analysis.
- Experiment with ATW, foveated rendering, and display sync settings.
- Keep ambient lighting consistent for inside-out tracking systems.
Conclusion
Low latency VR is the cornerstone of immersive, responsive, and comfortable virtual reality experiences. Through thoughtful hardware selection, meticulous software tuning, and rigorous calibration, you can slash system delays and elevate both gaming and professional applications to new heights.
Start optimizing today and transform your VR setup into a frictionless gateway to infinite digital realms.